How Solar System Custom Design Works for Homeowners
How Solar System Custom Design Works for Homeowners

Custom solar system design is the process of tailoring a solar installation to your home’s specific energy use, roof characteristics, and budget to maximize performance and savings. Unlike a one-size-fits-all approach, a properly engineered system accounts for your roof’s orientation, local shading patterns, and how much electricity your household actually consumes. The industry term for this process is photovoltaic (PV) system design, and understanding how solar system custom design works gives you a real advantage before you sign anything. Most residential systems fall in the 5–10 kWp range using 12–20 panels, but the right size for your home depends entirely on your usage data and site conditions.
What are the key steps in the custom solar design process?
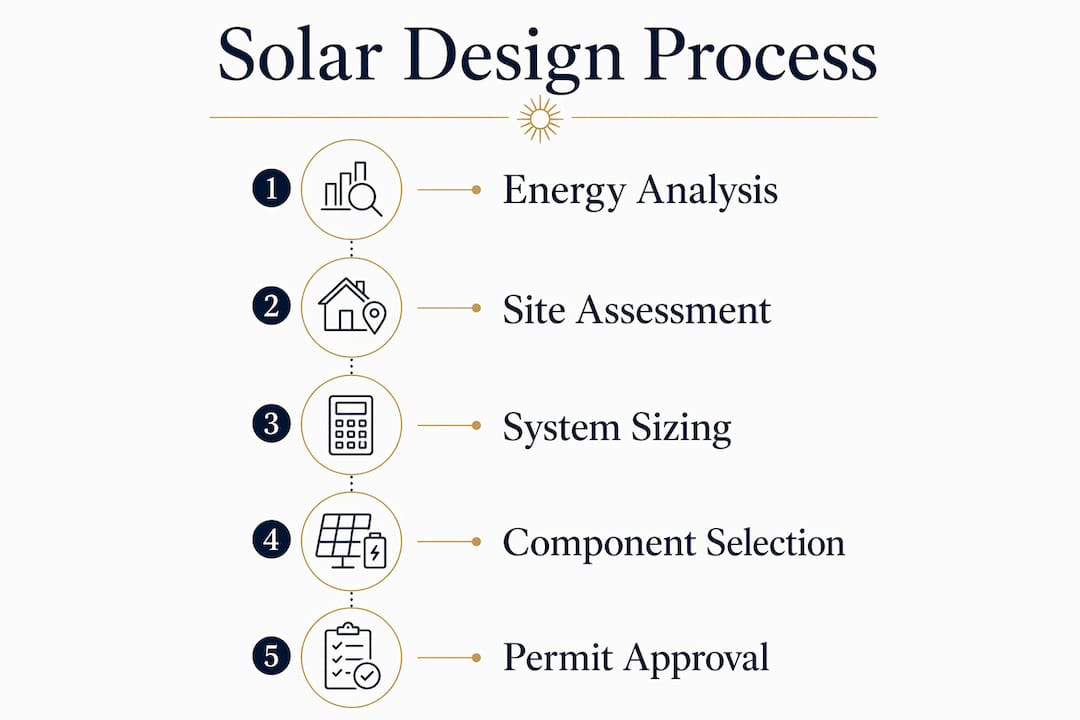
The residential solar design process follows a 12-step workflow, starting with electricity usage analysis and ending with a permit-ready plan set. An experienced designer completes this manually in 1–3 hours, or under an hour with modern software. Each step builds on the last, so skipping one creates problems downstream.
Here is how the process unfolds from start to finish:
- Electricity usage analysis. Your designer pulls 12 months of utility bills to calculate your average daily kilowatt-hour consumption. This number drives every sizing decision that follows.
- Roof assessment. The team evaluates your roof’s pitch, orientation, age, material, and any shading from trees or neighboring structures. A south-facing roof at a 20–30 degree pitch is ideal in San Diego, but east and west-facing roofs can still perform well with the right layout.
- System sizing. Engineers calculate how many panels you need to offset your target percentage of consumption, factoring in local solar yield data including Global Horizontal Irradiance (GHI) and Direct Normal Irradiance (DNI).
- Component selection. Panel wattage, inverter type, and battery storage options are chosen based on your roof’s shading profile and energy goals.
- Layout design. Panels are positioned to maximize sun exposure while respecting structural constraints, fire code setbacks, and future roof access.
- Permit-ready plan set. The final deliverable includes electrical single-line diagrams, structural drawings, and a scaled site plan ready for local jurisdiction review.
Pro Tip: Ask your installer to show you the 12-month energy analysis before any equipment is selected. If they skip straight to a panel count, that is a red flag.
How does modern solar design software improve accuracy?

Solar design software has changed what is possible in a single workday. Tools used by professional installers import 3D roof models and satellite imagery to generate precise panel layouts without a physical site visit. Automated shading analysis runs across all 8,760 hours of the year, catching obstructions that a quick roof walk might miss entirely.
Key capabilities that software brings to the custom solar panel layout process include:
- 3D roof modeling from satellite data, giving designers accurate pitch, azimuth, and usable surface area without manual measurement errors
- Automated shading analysis across a full year of hourly data, identifying which panels lose output and by how much
- String validation that checks whether panel groupings are electrically compatible with the chosen inverter
- Single-line diagram generation that produces permit-ready electrical drawings in minutes rather than days
That speed matters. Manual validation remains critical, however, because software cannot confirm that a panel placement aligns with the actual rafter locations beneath your roof or meets local building code setbacks. A layout that looks perfect on screen can require expensive rework if no one checks it against physical structural elements.
Pro Tip: Request a copy of the shading analysis report before installation begins. A good designer will show you exactly which panels are affected by shading and how that impacts your annual output estimate.
What technical trade-offs shape your custom solar panel layout?
Every custom solar design involves decisions that affect performance, safety, and long-term flexibility. None of these trade-offs have a single right answer. They depend on your roof, your goals, and how long you plan to stay in the home.
String inverters vs. microinverters
String inverters are cost-effective for roofs with consistent, unshaded sun exposure. Microinverters suit shaded environments because each panel operates independently, so one shaded panel does not drag down the output of the entire array. Modern residential inverters reach peak efficiencies up to 98.5%, making inverter selection less about raw efficiency and more about how well the technology matches your specific roof conditions.
DC-to-AC ratio and clipping
Designers typically size the solar array larger than the inverter’s rated AC output. A DC-to-AC ratio of 1.2–1.5 is the accepted standard. The array generates more power than the inverter can export at peak midday sun, which causes brief “clipping.” That trade-off is intentional. The extra panels capture more energy during morning and afternoon hours, improving total daily yield even though some peak output is lost.
Roof access and future maintenance
Custom design balances maximizing power output with preserving long-term property flexibility. A common mistake is covering every available roof surface with panels, leaving no clear path for future roofing work. Planning access pathways within the array from the start prevents costly panel removal and reinstallation when your roof eventually needs repairs.
Electrical safety devices
Rapid shutdown units and surge protectors are mandatory safety components that many homeowners never hear about until a failed inspection. Rapid shutdown allows firefighters to de-energize the array quickly in an emergency. Both devices must be specified during the design phase, not added as an afterthought at installation.
How do custom solar designs ensure compliance and permitting?
A permit-ready plan set is the physical proof that your system was designed to code. Without it, your local jurisdiction will not issue a permit, and your utility will not approve grid interconnection. The documentation package has several required components.
- Scaled site plan. Shows panel placement on the roof with fire code setback clearances marked. Most jurisdictions require a minimum 3-foot perimeter clearance on all roof edges.
- Electrical single-line diagram. Details every component in the system: wire sizes, conduit runs, breaker ratings, disconnect locations, and rapid shutdown device placement.
- Structural drawings. Verify that the mounting system can handle wind and snow loads for your specific roof type and local building code requirements.
- Engineer-stamped plans. Many jurisdictions require a licensed structural or electrical engineer to stamp the drawings before a permit is issued. This step adds credibility and catches design errors before they become field problems.
- Battery storage integration. Adding a Tesla Powerwall, Enphase IQ battery, or Franklin WH unit requires additional electrical diagrams showing how the battery connects to the inverter and main panel. Permit-ready phases that include battery storage typically take 5–10 business days depending on jurisdiction complexity.
San Diego Solar handles all permitting, SDG&E interconnection, and HOA approvals in-house. Homeowners who have worked with installers that outsource this step often report delays of weeks or months. Keeping permitting under one roof, literally and operationally, is one of the clearest advantages of working with a company that has been pulling San Diego permits since 1996.
For a deeper look at what makes a design permit-ready for solar, the specifics of roof clearance requirements matter more than most homeowners expect. Understanding solar panel roof clearance rules before your design is finalized can prevent last-minute layout changes.
Key Takeaways
A well-executed custom solar design integrates energy analysis, structural assessment, component selection, and permit-ready documentation into a single engineered plan that maximizes output and protects your home long-term.
| Point | Details |
|---|---|
| Start with usage data | Twelve months of utility bills drive every sizing and component decision in the design. |
| Software speeds design, not replaces judgment | Automated tools generate layouts fast, but manual validation against rafters and setbacks prevents costly rework. |
| DC-to-AC ratio matters | A ratio of 1.2–1.5 captures more daily energy even though peak output is occasionally clipped. |
| Plan for roof access | Leaving clear pathways in the array prevents expensive panel removal when roofing repairs are needed. |
| Permits require a full package | Electrical diagrams, structural drawings, and engineer stamps are all required before installation can legally begin. |
What I have learned after 30 years of solar designs in San Diego
The homeowners who get the most out of their solar investment are the ones who treat the design phase as seriously as the installation itself. I have seen beautifully installed systems that underperform by 20% or more simply because the design skipped a proper shading analysis. A tree that looks harmless in december casts a long shadow in june, and that shadow costs you money every single day.
The detail that surprises most homeowners is roof accessibility. Nobody thinks about it during the excitement of going solar. Then, five years later, they need a few tiles replaced and discover their entire array has to come off first. A good design accounts for this from day one. It costs nothing extra to leave a clear maintenance path, but fixing it after the fact can run into thousands of dollars.
Software has made the design process faster and more accurate than anything we had in the early 2000s. But the tool is only as good as the person using it. I have reviewed software-generated layouts that placed panels directly over structural valleys, or that ignored a 3-foot setback requirement on a hip roof. The software did not know. The engineer reviewing it should have. Integrating electrical and structural requirements as a single package from the start is the only way to avoid those surprises at inspection.
My honest advice: before you commit to any installer, ask to see the shading analysis, the DC-to-AC ratio they are targeting, and how they handle roof access in the layout. If they cannot answer those three questions clearly, the design is not done yet.
— Curtis Williamson
San Diego Solar’s approach to custom solar system design
San Diego Solar has designed and installed custom residential solar systems across San Diego County since 1996, and every project starts the same way: with your actual energy data, not a sales estimate.
The in-house engineering team handles site assessment, system sizing, component selection, and full permit-ready documentation without outsourcing a single step. That means one point of contact from design through SDG&E interconnection approval. San Diego Solar’s residential solar design process is built around your roof, your usage, and your goals, with transparent pricing and a written project timeline before you commit. Browse completed installations across San Diego to see how the design process translates into real-world results, then schedule a free consultation to get your custom system evaluation started.
FAQ
What is custom solar system design?
Custom solar system design is the process of engineering a solar installation specifically for your home’s energy use, roof layout, and local conditions. It produces a permit-ready plan set that covers electrical, structural, and layout requirements.
How long does the solar design process take?
An experienced designer completes a residential solar design in 1–3 hours manually or under an hour with software. The full permit-ready documentation package typically takes 5–10 business days depending on jurisdiction and whether battery storage is included.
What size solar system does most homes need?
Most residential systems fall in the 5–10 kWp range using 12–20 panels. The right size depends on your 12-month electricity consumption and the usable roof area available after setbacks and shading are accounted for.
Why does the DC-to-AC ratio matter in solar design?
A DC-to-AC ratio of 1.2–1.5 sizes the panel array larger than the inverter’s rated output. This captures more energy during morning and afternoon hours, improving total daily yield even though some peak midday output is clipped.
What documents are required for a solar permit?
A complete solar permit package includes a scaled site plan, electrical single-line diagram, structural drawings, and in many jurisdictions an engineer-stamped set. Battery storage systems require additional electrical documentation showing how the battery integrates with the inverter and main panel.