Composition Shingle Solar Compatibility: What to Check First
Composition Shingle Solar Compatibility: What to Check First
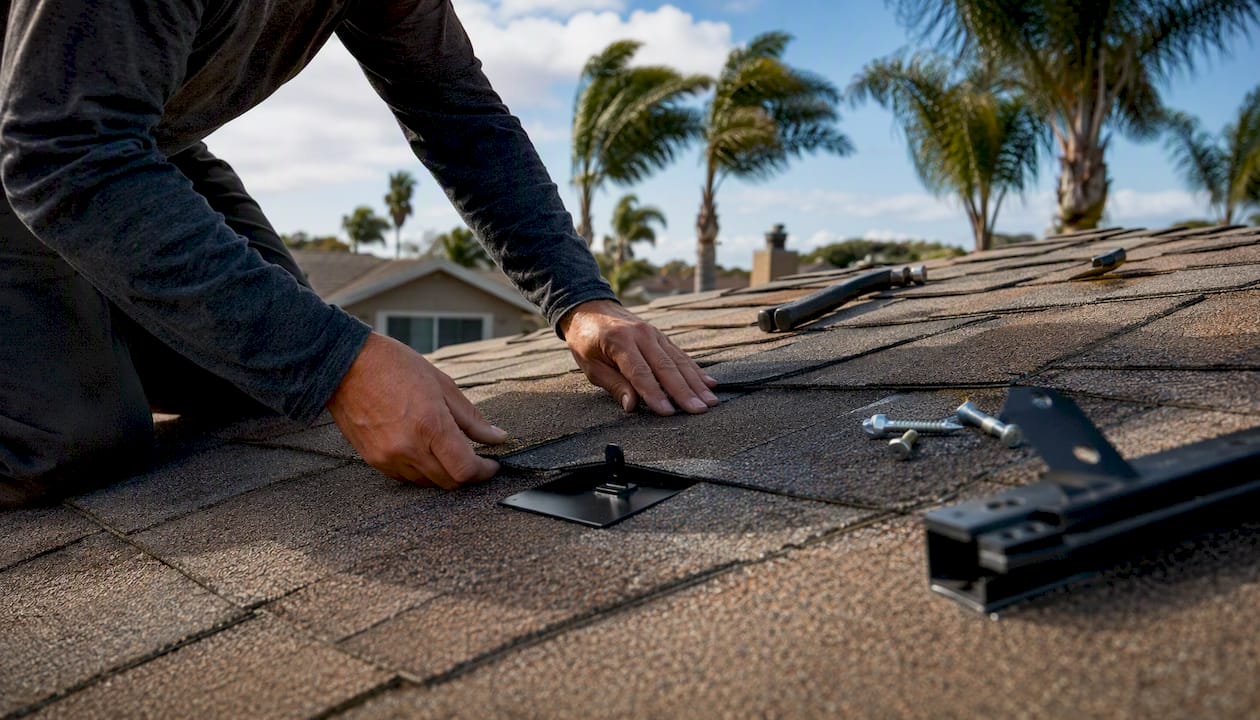
Yes, composition (asphalt/composite) shingle roofs are generally compatible with rooftop solar panels, and they are, in fact, the substrate most racking systems are specifically engineered around. The American Solar Energy Society confirms that asphalt shingles are among the easiest and most compatible roof coverings for standard PV mounting. Before you schedule a consultation, run through three quick checks:
- Roof remaining life: Shingles should have at least 7–10 years of useful life left. Installing solar on a roof you will need to replace in five years means paying to remove and reinstall the array.
- Rafter and deck access: Flashed, rafter-anchored mounts require locating rafters from the attic and confirming deck condition (plywood or OSB, no rot or delamination).
- Mounting system and waterproofing: Require UL-listed racking (UL 2703 or UL 61730) with proper flashed penetrations, not sealant-only attachment. Systems like EcoFasten composition mounts and Zep Solar’s ZS Comp architecture are examples of tested approaches for this roof type.
Pro Tip: Ask your installer which UL-listed racking system they use and request the cut sheet before signing. If they cannot name the listing, that is a red flag worth addressing before any work begins.
Key Takeaways
Composition shingles are the most installer-friendly substrate for rooftop solar, but the installation quality depends entirely on flashing method, rafter anchorage, and pre-install roof condition assessment.
| Point | Details |
|---|---|
| Confirm roof remaining life | Shingles need at least 7–10 years of life left; fewer than that, bundle a reroof with the solar project. |
| Require flashed, rafter-anchored mounts | Woven flashing plus rafter-anchored lags (not sealant-only) is the standard that preserves shingle warranties. |
| Verify UL listings and permits | Ask for UL 2703 and UL 61730 cut sheets and confirm the installer pulls a permit with a structural plan. |
| Document every penetration | Photos of flashing under the shingle and attic rafter hits protect you in any future warranty dispute. |
| San Diego Solar | Offers combined roof-and-solar packages, in-house engineering, and full permit handling for San Diego County homeowners. |
Table of Contents
- Why composition shingles work so well with rooftop solar
- Common mounting methods and best practices for a watertight install
- Flashing, sealants, and warranty-safe waterproofing methods
- How to assess roof condition and decide when to reroof first
- Structural, fire-classification, and permitting requirements you should expect
- PV shingles vs. conventional rack-mounted panels on a composition roof
- What to ask and verify when hiring a solar installer for a composition roof
- How San Diego Solar handles composition shingle installations
- What installers actually tell homeowners about composition-shingle solar projects
- San Diego Solar’s composition-shingle solar services
- Sources
Why composition shingles work so well with rooftop solar
Composition shingles cover more U.S. homes than any other roofing material, and that ubiquity is exactly why the solar industry built its standard mounting hardware around them. Rafter spacing on composition-shingle homes follows predictable patterns (typically 16 or 24 inches on center), course exposures are consistent, and the plywood or OSB deck beneath accepts lag screws cleanly when driven into solid framing.
The roofing assembly itself, shingle plus underlayment plus structural deck plus rafters, is well-suited to flashed, penetrating mounts. When an installer follows the manufacturer’s installation sequence, the flashing integrates with the shingle courses the same way a standard pipe boot does. Nothing exotic is required.
There is also a thermal benefit worth knowing. Research reported by Phys found that solar arrays can shade roof surfaces and reduce surface temperatures beneath the panels, which may reduce UV-related shingle degradation in some climates. The effect varies by roof pitch, climate, and panel clearance, so treat it as a potential upside rather than a guarantee.
ENERGY STAR’s rooftop solar guidance reinforces that composition-shingle homes are a natural fit for standard PV systems, and the Quick Mount PV composition roof guide recommends a pre-install evaluation that includes identifying the shingle manufacturer, measuring course exposure, and confirming rafter size and spacing before any hardware is ordered.
Key reasons installers prefer composition shingles:
- Standard rafter patterns make structural attachment predictable
- Consistent course exposure simplifies flashing integration
- Plywood and OSB decks accept lag fasteners without special anchors
- Industry-tested flashing products are widely available for this substrate
- Cool roof interactions can extend shingle life under the array in warm climates
Common mounting methods and best practices for a watertight install
The mounting system is the single biggest factor in long-term roof performance under solar. Flashing sequence, rafter anchorage, and attachment spacing calculated from ASCE 7 and the racking manufacturer’s engineering letter determine whether your roof stays dry for 25 years or develops a slow leak in year three.
Penetrating flashed mounts
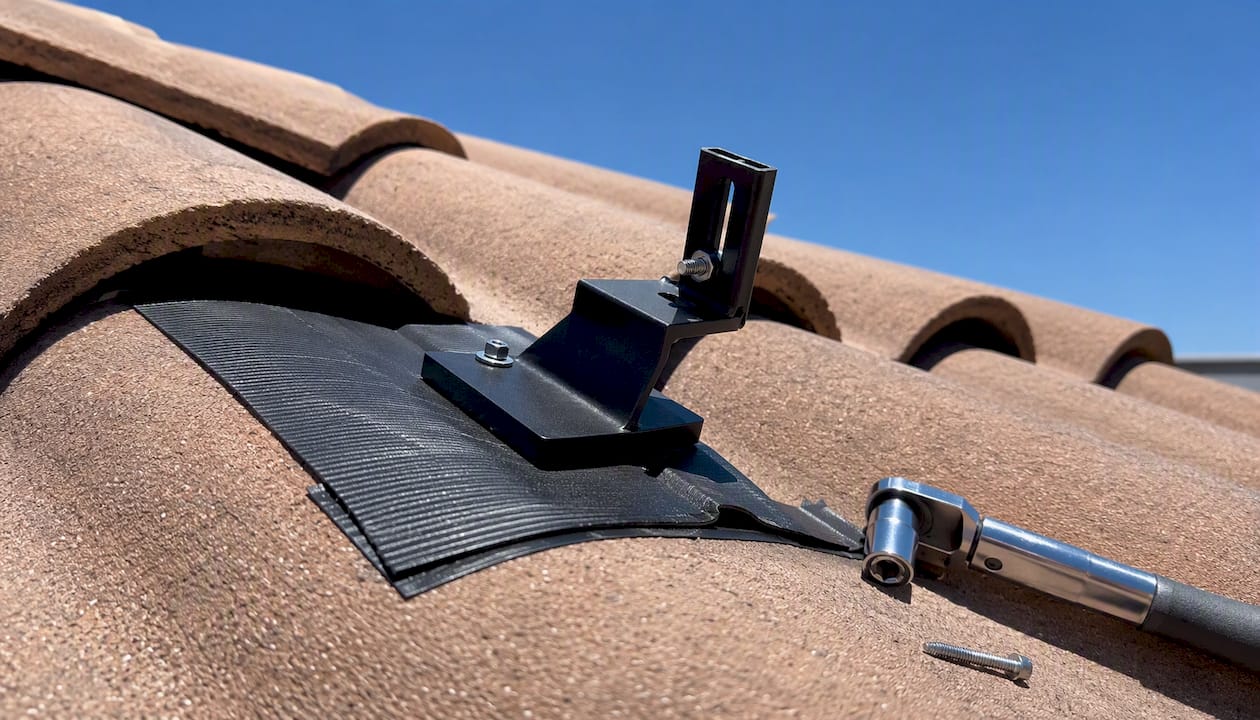
The dominant method for composition shingles is a rafter-anchored, flashed penetration. The installer lifts the shingle course above the mount location, slides the flashing under the upper course and over the lower course (woven flashing), lags into the rafter, seals per the manufacturer’s specification, torques to spec, and dresses the shingle back over the flashing. No exposed fastener. No sealant bead as the primary water barrier.
Rail-based vs. railless systems
Rail-based systems run aluminum rails across multiple attachment points, distributing load and tolerating minor framing irregularities. They are more forgiving when rafters are not perfectly spaced or when a rafter hit is slightly off-center. Railless systems reduce part count and lower wind profile but demand precise rafter hits and tighter layout discipline. For homes with irregular framing, a rail-based approach is usually the safer call.
The Zep ZS Comp installation guide documents a drop-in interlock architecture for composition arrays, including thermal expansion joint guidance (12-inch gaps between sub-arrays) and grounding limits (one Ground Zep can ground up to 72 modules). EcoFasten’s composition mount line takes a similar flashed-penetration approach and is recognized under UL 2703 listings.
Step-by-step attachment sequence
- Locate rafters from the attic and mark externally.
- Confirm rafter size, spacing, and deck condition (no rot, delamination, or prior leak damage).
- Lift the shingle course above the mount point without cracking the tab.
- Install flashing, woven under the upper course and over the lower course.
- Lag the mount into the rafter center at the manufacturer’s specified torque.
- Apply sealant per the racking manufacturer’s instructions (supplement, not primary seal).
- Dress the shingle back over the flashing and inspect the course alignment.
- Photograph the flashing under the shingle and the attic rafter hit before closing up.
Pro Tip: In high-wind zones (ASCE 7 Exposure Category C or D) or homes with unusual framing, ask your installer for an engineering letter from a licensed structural engineer confirming attachment spacing and load calculations. This protects you if a permit inspector or insurance adjuster questions the install later.
For more on how weight and attachment affect your home’s framing, the roof load-bearing guide covers structural thresholds and when reinforcement is needed.
Flashing, sealants, and warranty-safe waterproofing methods
Sealant is a supplement, not a waterproofing strategy. Any installer who proposes to lag a mount through a shingle and seal over the fastener without proper flashing is describing an approach that most shingle manufacturers explicitly reject in their installation instructions. That distinction matters for your warranty.
Woven flashing that integrates with the shingle course is the accepted method because it mimics how standard roofing flashings work. Water that gets past the shingle surface hits the flashing and is directed down the roof plane, not into the penetration. Sealant fills the micro-gap between the mount base and the flashing, but it is the flashing geometry that does the real work.
Key waterproofing and warranty practices to require:
- Flashing must be woven into the shingle course, not just slid under the top shingle.
- Sealant type must be compatible with the shingle manufacturer’s specifications (typically a non-hardening butyl or silicone; check the shingle manufacturer’s installation guide for approved products).
- No exposed fastener heads above the shingle surface.
- Every penetration gets its own flashing. Shared flashings for adjacent mounts are not standard practice.
- Document each flashing installation with a photo before the shingle is dressed back over it.
Missed rafters are the most common cause of long-term failures. A lag that misses the rafter and sits in the deck alone will work loose over time, especially under wind uplift. The Quick Mount PV guide specifically recommends confirming rafter hits from the attic after installation, not just trusting the exterior mark.
Pro Tip: Before your installer leaves the job, ask for two photos per mount: one showing the flashing under the lifted shingle and one from the attic showing the lag in the rafter. Store these with your warranty documents. If a leak ever develops, these photos are the difference between a fast warranty claim and a prolonged dispute.
How to assess roof condition and decide when to reroof first
The decision to install solar on an existing roof or bundle a reroof with the solar project is mostly a math problem. If your shingles have fewer than 7–10 years of remaining life, removing and reinstalling the solar array for a roof replacement will cost more than combining both projects upfront.
Practical inspection checklist
Before your solar consultation, walk your roof or have a roofer assess:
- Shingle age and manufacturer: Most three-tab shingles carry a 20–25 year design life; architectural shingles typically 30 years. Age alone does not tell the full story, but it sets the baseline.
- Curl, cupping, or granule loss: Curled tabs and bare spots signal accelerated weathering.
- Hail or impact bruising: Soft spots under foot or visible impact marks on the surface.
- Underlayment condition: Visible tears, bubbling, or staining on the underside of the deck from the attic.
- Deck integrity: OSB that has delaminated or plywood with soft spots will not hold lag fasteners reliably.
- Prior leak evidence: Staining on rafters or deck sheathing in the attic, even if dry now.
The 10 signs your roof is solar-ready checklist covers each of these in detail and is worth reviewing before your first installer visit.
When to bundle roof replacement with solar
- Shingles are within 5–7 years of end-of-life.
- Multiple damaged or missing courses require repair before mounting.
- The deck has soft spots or prior water damage that needs remediation.
- You are already planning a reroof for other reasons (insurance claim, HOA requirement).
Combined roof-and-solar packages coordinate permits, sequencing, and warranties under one contractor. The reroof happens first, the solar goes on a fresh substrate, and you avoid the cost of a future panel removal and reinstall. San Diego Solar’s solar roofing packages are structured exactly this way, with one crew handling both scopes.
Structural, fire-classification, and permitting requirements you should expect
Every rooftop solar installation on a composition-shingle home in the U.S. requires a building permit, and most jurisdictions follow the International Residential Code (IRC R324) and NFPA 70 (NEC Article 690). Understanding what your installer needs to submit protects you from surprises during inspection.
Code and standards checklist
- IRC R324 / ISEP Chapter 4: Sets structural, access, and fire pathway requirements for rooftop PV. The 2021 ISEP requires 3-foot access pathways on each side of the roof ridge and 18-inch clearances from hips and valleys. These rules directly affect how many panels fit on your roof.
- NFPA 70 / NEC Article 690: Governs the electrical side: wiring methods, rapid shutdown requirements, and inverter placement.
- UL 2703: The listing standard for PV mounting and bonding systems. Require a cut sheet showing UL 2703 listing for any racking system proposed.
- UL 61730: Module-level safety standard for PV panels themselves.
For a full breakdown of what goes into a roofing permit for solar, including what local authorities typically require in San Diego County, that guide covers the documentation checklist in detail.
Structural analysis: when you need an engineering letter
| Condition | Engineering letter required? |
|---|---|
| Standard framing (16" or 24" o.c.), low-wind zone | Usually not required if racking system has pre-engineered specs |
| High-wind zone (ASCE 7 Exposure C/D) | Typically required |
| Unusual rafter spacing or non-standard framing | Required |
| Heavy snow load area | Required |
| Roof deck reinforcement or blocking needed | Required |
The structural plan submitted with your permit should show rafter spacing, load calculations, rack weights, and attachment spacing. For more on how load calculations work, the roof load-bearing guide explains the thresholds in plain terms.
Fire access and egress path requirements also affect panel layout. The 3-foot ridge pathway and hip/valley clearances under ISEP Chapter 4 are not negotiable, and a layout that ignores them will fail inspection. Solar panel roof clearance covers how these setbacks translate to actual panel placement on pitched roofs.
PV shingles vs. conventional rack-mounted panels on a composition roof
PV shingles (building-integrated photovoltaics, or BIPV) replace the roof covering itself with photovoltaic material. Conventional rack-mounted panels sit above the existing shingles on a mounting system. Both work on composition-shingle decks, but the trade-offs are significant.
| Factor | Rack-mounted panels | PV shingles (BIPV) |
|---|---|---|
| Roof covering function | Shingles remain; panels add a second layer | PV shingles replace the roof covering entirely |
| Code standard | UL 2703, UL 61730 | UL 2703 (BIPV-specific listing required) |
| Installer qualification | Solar installer with roofing experience | Requires both roofing and electrical credentials per NRCA guidance |
| Repairability | Individual panels replaceable without reroofing | Damaged sections may require roofing trade involvement |
| Aesthetics | Visible panel profile above roofline | Flush with roof surface |
| Cost | Lower installed cost in most markets | Higher installed cost |
The NRCA’s BIPV guidance is direct about the complexity: rooftop BIPV combines roofing and electrical functions in a single product, which creates code overlap between IRC and NFPA 70 and complicates trade responsibilities. The installer must be qualified for both.
For most homeowners with composition-shingle roofs, rack-mounted panels are the practical choice. They are easier to repair, simpler to reroof around, and carry a longer track record of field performance. BIPV makes sense when aesthetics are the priority and the homeowner is already planning a full roof replacement.
What to ask and verify when hiring a solar installer for a composition roof
The quality of a composition-shingle solar installation comes down almost entirely to the installer’s roofing knowledge, not just their solar credentials. An electrician who has never flashed a penetration is not the right person for this job.
Questions to ask before signing
- Can you show me photos of recent composition-shingle installs, specifically the flashing under the shingle?
- Do you have a licensed roofer on your crew, or do you subcontract roofing work?
- How do you verify rafter hits, from the attic or only from the exterior?
- Which UL-listed racking system do you use, and can I see the cut sheet?
- Who handles the structural engineering letter if one is required?
- How do you coordinate with my shingle manufacturer’s warranty requirements?
- What documentation do I receive after installation (photos, permit, engineering letter)?
Red flags to watch for
- Sealant-only mounting with no flashing
- Refusal to show flashing photos from previous jobs
- No attic rafter verification step in their process
- Vague or verbal-only warranty commitments
- Subcontracted roofing work with no direct oversight
Request pre-install documentation: a roof inspection report, a layout plan showing access pathways and setbacks, and the racking system cut sheets with UL listings. If the installer cannot produce these before work starts, the permit process will surface the gaps anyway, but by then you are already committed.
How San Diego Solar handles composition shingle installations
San Diego Solar’s process for composition-shingle rooftop solar is built around the same documentation and sequencing standards described throughout this article, executed by a single in-house crew from inspection through interconnection.
The workflow runs like this:
- Free consultation and roof assessment: An in-house team member evaluates shingle condition, age, and remaining life, inspects the attic for rafter size, spacing, and deck integrity, and identifies any pre-existing leak evidence.
- Custom engineering design: The in-house engineering team designs the system layout around your specific rafter pattern, roof pitch, and local code requirements, including access pathway setbacks and structural attachment spacing.
- Permit handling: San Diego Solar manages all permit submissions, including structural plans, one-line electrical diagrams, racking cut sheets, and rapid shutdown labeling, coordinating directly with the local building department.
- One-crew installation: The same crew that designed the system installs it. No subcontractors. Flashing sequence, rafter verification, and torque specs are followed per the racking manufacturer’s instructions and the permit-approved plans.
- SDG&E interconnection and HOA approvals: San Diego Solar handles both, so you are not chasing paperwork after the panels are up.
- Warranty handover: After installation, you receive photos of each flashing penetration, attic rafter-hit documentation, the permit card, manufacturer cut sheets, and a written warranty summary.
San Diego Solar has been installing rooftop solar in San Diego County since 1996, with thousands of completed residential systems and 30 years of in-house crews. We pulled the first commercial solar permit in the City of San Diego and have handled every permitting, interconnection, and HOA approval in-house since day one. When you hire us, one team owns the entire project from inspection to final sign-off.
That depth of institutional knowledge matters on composition-shingle roofs specifically, where the difference between a 25-year leak-free install and a warranty dispute often comes down to a single flashing photo taken before the shingle was dressed back over the mount.
What installers actually tell homeowners about composition-shingle solar projects
Most of what follows does not come up in a sales call. It comes up after the job, when a homeowner calls with a question.
Take attic photos before the installation starts, not just after. Pre-existing staining or soft spots in the deck that appear after the install are almost impossible to attribute correctly without a baseline. A five-minute attic walkthrough with your phone camera before the crew arrives protects everyone.
Expect extra labor time when rafters are irregular. Homes built before the 1980s sometimes have non-standard framing, and locating solid rafter centers on a 20-inch or 12-inch spacing takes longer than a standard 16-inch layout. A good installer will flag this during the roof assessment; a rushed one will not.
Prioritize a roof replacement if your shingles have fewer than 7–10 years of remaining life. The math is straightforward: panel removal and reinstall for a roof replacement typically adds cost and time that a combined project avoids. If you are on the fence, a combined solar and roofing package is almost always the better financial decision.
After installation, schedule an annual check of flashing condition and mount torque. Thermal cycling loosens fasteners over time, and a loose mount is easier to address at year one than at year five when water has been working its way in. Clear debris from the panel edges and gutters, and document any roof repairs done after the solar install with photos and dates. If a shingle is replaced near a mount, note it. That record matters if a warranty question ever arises.
The manufacturer-prescribed installation sequence is not optional. Following it is what preserves both the shingle warranty and the racking system warranty. Skipping steps to save time on the job is the most common source of warranty disputes, and it is entirely avoidable.

San Diego Solar’s composition-shingle solar services
Homeowners with composition-shingle roofs in San Diego County get a straightforward path to solar with San Diego Solar: one crew, one warranty, and no subcontractors at any stage.

San Diego Solar offers roof readiness inspections, combined roof-and-solar packages, in-house engineering, and full permit and SDG&E interconnection handling. The 30% federal Investment Tax Credit covers panels, battery storage, and installation costs, and most San Diego homeowners see full payback in 5–7 years with electric bill reductions of 80–92%. If your roof needs replacement before solar goes on, San Diego Solar coordinates both scopes under one contract so you avoid the cost of a future panel removal and reinstall.
Your free consultation includes a written roof inspection report, a custom system layout with access pathway setbacks, and a written project timeline before you commit to anything. Request a quote for residential solar in San Diego and get a clear picture of what your composition-shingle roof can support.
Sources
These are the primary references behind this article. Each one is worth bookmarking before your installer consultation.
- Zep ZS Comp System Installation Guide (LA County recognized UL 2703 racking systems)
- These Roofing Options Pair Best With Solar Panels — ASES