Why Solar Installation Quality Affects Output
Why Solar Installation Quality Affects Output
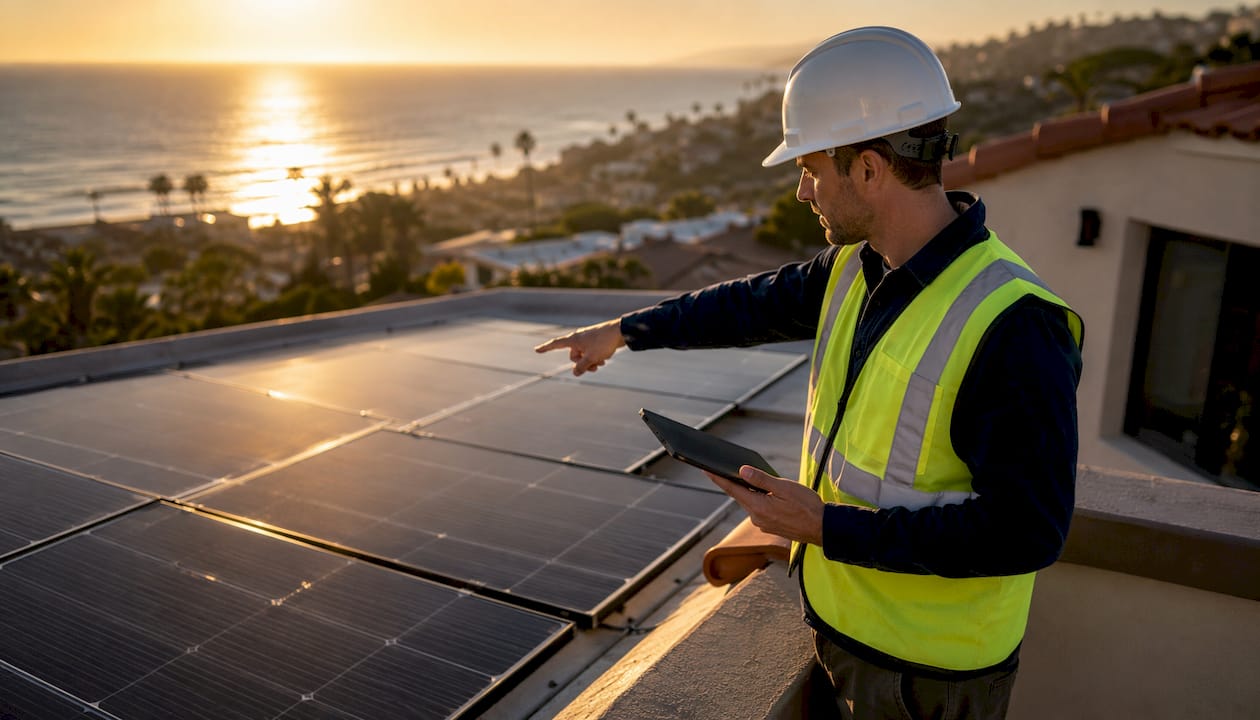
Yes, installation quality directly determines how much energy your solar system actually delivers. A premium panel on a poorly installed system will underperform a mid-grade panel installed correctly every single time. The difference is not marginal.
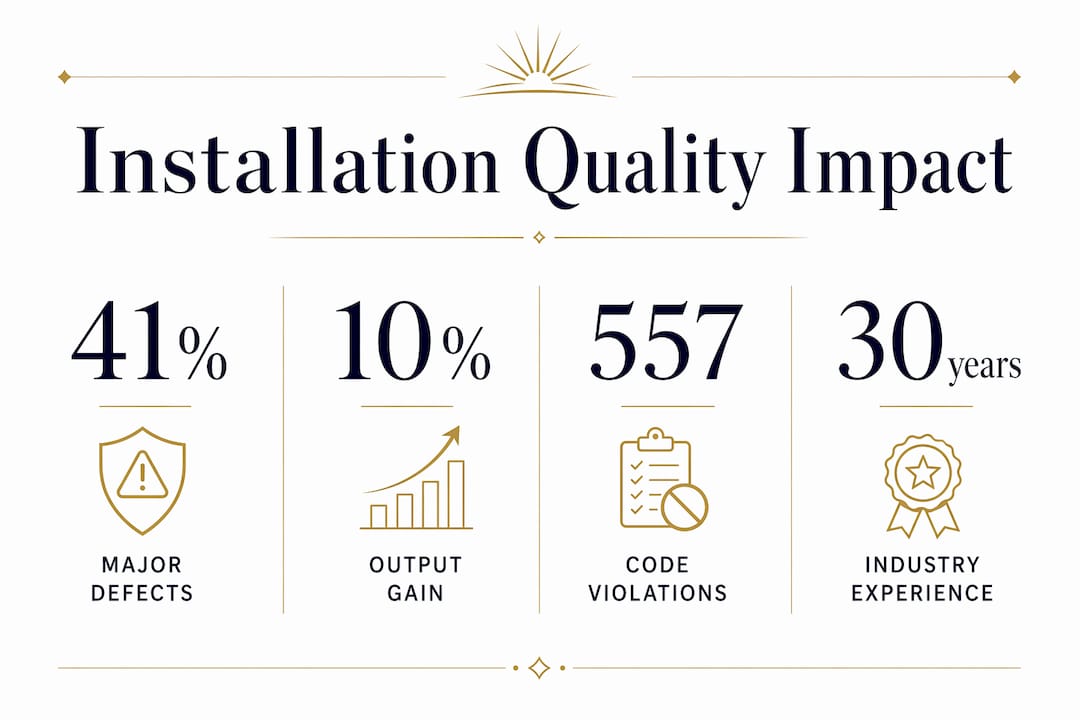
Here is the practical range: minor workmanship issues such as loose labeling or slightly suboptimal tilt typically cause small but noticeable reductions in annual output. Moderate faults like incorrect string wiring, undersized conductors, or shading miscalculations lead to more significant losses. Major errors, including improper grounding, connector failures, or inverter sizing mistakes, can severely reduce output and may even cause a complete system shutdown. A Rhode Island inspection study found that 41% of inspected renewable energy systems had major or critical installation deficiencies, meaning problems expected to cause system failure, reduced operating capacity, or safety hazards.
The sections below walk through every layer of this: how environment compounds installation mistakes, which components matter most, what common errors actually cost you, and a practical checklist you can use right now to evaluate any system or installer.
Table of Contents
- Why solar installation quality affects output more than panel brand
- How environment and installation choices compound each other
- Which components and material choices actually move the needle
- Common installation errors and what they actually cost you
- How design and commissioning mistakes reduce yield over time
- How monitoring and maintenance protect your output over decades
- Safety consequences of poor installation
- What the research actually shows about output losses from installation faults
- How to identify poor installation and what to do about it
- Key Takeaways
- The installation quality gap nobody talks about
- San Diego Solar delivers the installation quality this article describes
- Useful sources and further reading
Why solar installation quality affects output more than panel brand
The solar industry has spent years marketing panel efficiency ratings. What it has not marketed nearly as aggressively is that workmanship matters more than panel brand in determining what your system actually produces. Panels are components. The installation is the system.
Think of it this way: a high-efficiency panel is like a high-performance engine. Drop it into a car with the wrong transmission, misrouted fuel lines, and a clogged air filter, and you will not get the performance the spec sheet promised. The same logic applies to solar. Miswiring, poor shading analysis, and incorrect inverter sizing all degrade real-world output regardless of what the panel’s nameplate says.
This framing matters because homeowners often spend considerable time comparing panel brands while giving the installer a cursory glance. The installer’s workmanship, documentation practices, and commissioning process will have a larger effect on your 25-year energy production than whether you chose one tier-one panel over another.
How environment and installation choices compound each other
Environmental conditions set the ceiling for what your system can produce. Installation quality determines how close you actually get to that ceiling.
The core environmental factors:
- Solar irradiance: The amount of sunlight hitting your roof. Fixed by geography and season, but affected by how well the installer accounted for local weather patterns in the system model.
- Module temperature: Solar cells lose efficiency as they heat up. The DOE confirms that higher temperatures cause a significant decrease in voltage, reducing output. Proper thermal management, including adequate roof clearance for airflow, directly controls how hot your panels run.
- Shading: Even a small shadow on one panel can collapse output across an entire string on a conventional string inverter. A good installer maps shade patterns across all seasons before finalizing panel placement.
- Soiling: Dust, pollen, and soot accumulate on panel surfaces and reduce the light reaching the cells. How accessible your panels are for cleaning depends entirely on how the racking was designed and installed.
- Local microclimate: Salt spray near the coast accelerates connector and racking corrosion. Wind loading affects racking integrity. A competent installer accounts for these in material selection.
The interaction between these factors and installation quality is where homeowners get surprised. A poorly positioned array that catches afternoon shade loses more than the shaded hours suggest, because on a string inverter, the weakest panel drags down every panel in the string. An installation that leaves panels flush against the roof with no airflow gap runs modules hotter than they need to be, compounding the temperature coefficient penalty every sunny afternoon.
Pro Tip: Ask your installer to show you a shading analysis report, not just a production estimate. Tools like Aurora Solar or PVWatts generate hour-by-hour shade maps. If your installer cannot produce one, that is a red flag.
Which components and material choices actually move the needle
Not every upgrade on a spec sheet translates to meaningfully more energy. Here is where the real differences live.
Components that directly affect delivered output:
- Panel cell type and efficiency: Monocrystalline PERC and TOPCon cells outperform polycrystalline in low-light and high-temperature conditions. The gap matters most in climates with frequent cloud cover or high ambient temperatures.
- Inverter topology: String inverters are cost-effective but vulnerable to mismatch losses when any panel underperforms. Microinverters and DC optimizers (Enphase IQ, SolarEdge) allow each panel to operate independently, recovering output that a string inverter would lose to shading or mismatch.
- Racking and mounting: Racking that holds panels at the correct tilt and azimuth maximizes irradiance capture. Equally important, good racking provides an airflow gap between the panel and the roof surface. Installations that mount panels flush against the roof trap heat and raise operating temperatures.
- Cable gauge and MC4 connectors: Undersized conductors create resistive losses. Poorly crimped or mismatched MC4 connectors are a leading cause of arc faults and gradual output degradation. Research on interconnection failures confirms that connector and solder joint failures reduce output and cause energy yield models to inaccurately predict module performance.
- Combiner boxes and fusing: Correct fusing protects the system and prevents nuisance trips that take strings offline intermittently.
Pro Tip: Inverter sizing is a two-sided mistake. An undersized inverter clips peak-hour production when the array generates more than the inverter can handle. An oversized inverter runs below its efficiency sweet spot during typical output hours. A small amount of intentional clipping (roughly 5–10% DC-to-AC ratio above 1.0) is normal and acceptable. Ask your installer to show you the DC-to-AC ratio and explain the clipping assumption in the production model.
The honest answer on components: workmanship usually matters more than the brand of panel you choose. A correctly installed mid-tier panel will outperform a premium panel with poor cable routing, mismatched connectors, and no commissioning check.
Common installation errors and what they actually cost you
A field engineering study found that correcting string connection errors alone produced roughly a 10% production increase in one documented case. That is not a rounding error. That is a year’s worth of electricity on a typical residential system.
The table below outlines common installation mistakes and their effects on typical output, described qualitatively:
- Incorrect string wiring or mismatch can cause notable conflicts affecting panel power tracking.
- Inverter clipping due to undersizing leads to energy loss during peak production hours.
- Undersized conductors create voltage drops, especially over longer cable runs.
- Loose or corroded MC4 connectors degrade performance over time and increase fire risk.
- Shading miscalculations vary in impact depending on obstruction and panel layout.
- Poor thermal management without proper airflow increases losses on hot days.
- Improper grounding or bonding poses safety shutdown risks which may interrupt output.
- Roof penetration leaks cause system downtime due to necessary repairs.
The Rhode Island study found 557 code violations across 90 inspected systems, with the most severe defects concentrated at the PV array and the supply-side interconnection point. Grounding, labeling, and wire management failures were the most frequent categories at both locations.
What makes this particularly frustrating for homeowners: most of these errors are invisible without commissioning data. A system that is producing 12% less than it should looks fine from the ground. The inverter is running. The monitoring app shows green. Only when you compare actual production against the modeled baseline does the gap become visible.
Visible red flags you can spot yourself:
- Unlabeled junction boxes or disconnect switches
- Cables bundled loosely or draped without conduit protection
- Missing sealant or flashing at roof penetrations
- No commissioning paperwork provided at project close
- Panels installed with no visible airflow gap from the roof surface
- Mismatched connector brands on the same string (a known arc-fault risk)
If you want a framework for evaluating an installer before you sign, the signs of a trustworthy solar installer checklist covers the documentation and process signals that separate disciplined crews from the rest.
How design and commissioning mistakes reduce yield over time
The electrical design phase is where many output problems are locked in before a single panel goes on the roof. By the time the system is installed, fixing a design error costs far more than getting it right the first time.
Commissioning checks every homeowner should request in writing:
- Open-circuit voltage (Voc) measurement for each string
- Operating current and voltage under load
- Irradiance-normalized production baseline at commissioning
- Torque verification on all racking hardware and electrical connections
- Polarity check on all strings before inverter connection
- Rapid-shutdown function test
- Arc-fault circuit interrupter (AFCI) function verification
- Labeling audit against the permitted plan set
Design errors that reduce yield include incorrect MPPT zone assignments (pairing panels with different orientations or tilt angles on the same MPPT input), conductor sizing that creates voltage drop on long roof-to-inverter runs, and protective device settings that trigger intermittent shutdowns during normal operating conditions.
The string inverter versus microinverter question comes down to your roof. A simple south-facing roof with no shading is well-served by a quality string inverter. A roof with multiple orientations, dormers, chimneys, or trees nearby benefits substantially from module-level power electronics. Microinverters and DC optimizers eliminate the bottleneck effect where one shaded panel pulls down the whole string. The output difference on a complex roof can be 10–20% annually.
Pro Tip: Before your system goes live, ask for a string-level IV curve trace or at minimum a per-string production baseline. This creates a documented starting point. If production drops 18 months later, you have evidence to support a warranty or callback claim rather than a dispute about what “normal degradation” looks like.
The solar system engineering process explains what a properly documented design and commissioning workflow looks like from an engineering standpoint, which is useful context when evaluating what your installer is actually handing you.
How monitoring and maintenance protect your output over decades
A solar system that is not monitored is a system you are flying blind on. Faults that take a string offline, connectors that degrade gradually, and soiling that accumulates over a dry summer can all reduce output for months before anyone notices.
The long-term output threats worth tracking:
- Natural panel degradation (typically 0.5–0.7% per year for quality modules) is unavoidable but predictable.
- Connector corrosion and gradual resistance increases are avoidable with proper installation and periodic inspection.
- Roof leaks at penetration points force panel removal and create extended downtime.
- Soiling losses vary by location. In San Diego County, dry summers with low rainfall mean panels can lose meaningful output between cleanings.
Monitoring platforms like Enphase Enlighten and SolarEdge monitoring provide panel-level or string-level data that makes fault detection far faster than waiting for your utility bill to look wrong. Without monitoring, a homeowner might not notice a string has been offline for three months. With monitoring, that fault shows up as an alert within hours.
Maintenance practices that preserve output:
- Schedule panel cleaning based on local soiling rates, not a fixed calendar. After Santa Ana wind events or prolonged dry spells, cleaning sooner pays off.
- Request periodic torque checks on racking hardware, particularly after the first year of thermal cycling.
- Keep commissioning reports and warranty registrations in a dedicated file. These are your primary protection if a workmanship issue surfaces years later.
- Review your monitoring data monthly, not just when something looks wrong. Slow declines are harder to catch than sudden failures.
Professional solar panel cleaning in San Diego recovers output losses that accumulate invisibly between rain events, particularly on low-tilt installations where self-cleaning is limited.
Safety consequences of poor installation
Installation errors do not just reduce output. Some of them start fires. Industry incident analyses link a significant share of residential solar fires and safety incidents to installer error, with connector faults, improper grounding, and arc-fault protection failures appearing repeatedly in incident reviews.
Safety-related failure modes that also affect production:
- Arc faults from connector failures: Loose or mismatched MC4 connectors create resistance that generates heat. At high enough resistance, arcing occurs. AFCI devices are designed to detect this, but only if they are installed and tested correctly.
- Improper grounding and bonding: A grounding fault can trigger protective shutdowns that take the system offline. Repeated nuisance trips from a grounding issue can cost weeks of production before the root cause is identified.
- Unsealed roof penetrations: Water intrusion causes structural damage that eventually forces panel removal. The system is offline during repairs, and the homeowner bears costs that a proper installation would have prevented.
- Rapid-shutdown non-compliance: Systems without functioning rapid-shutdown devices create serious hazards for firefighters. Some jurisdictions require rapid-shutdown retrofits on older systems before they can be re-energized after an incident.
Pro Tip: Request written documentation that your system’s AFCI and rapid-shutdown devices were tested at commissioning. This is not a bureaucratic formality. It is the difference between a system that shuts down safely during a fault and one that does not.
One financial consequence that surprises homeowners: most panel manufacturer warranties cover the hardware but exclude damage caused by installation errors. If a roof leak traced to improper flashing destroys a panel, the manufacturer warranty will not cover it. The installer’s workmanship guarantee is your actual protection, which is why choosing an installer with a documented track record and clear warranty terms matters as much as the panel brand itself.
What the research actually shows about output losses from installation faults
The numbers from independent inspection studies are sobering.
| Study / Source | Key Finding | Context |
|---|---|---|
| Rhode Island REG Installation Quality Study | 41% of systems had major or critical deficiencies | 90 systems inspected; defects concentrated at array and interconnection point |
| Rhode Island REG Study | 557 code violations across 90 systems | — |
| Engineering workmanship study | ~10% production increase after correcting string connection errors | Field case; documents tangible output gains from fixing design errors |
| OSTI interconnection failure research | Connector and solder joint failures reduce output and cause energy yield models to inaccurately predict module performance | Lab and field analysis of ribbon-tabbing failure modes |
| SurgePV installation mistake analysis | Inverter sizing and shading miscalculation are major drivers of long-term underperformance | Industry practitioner review of common callback and warranty claim causes |
The Rhode Island study is particularly useful context because it covered systems that had already passed permitting and local inspections. These were not obviously failed installations. They had been reviewed and approved. Yet 41% still had deficiencies serious enough to affect performance or safety. That figure suggests the permitting process alone is not a reliable quality filter.
The engineering study’s 10% production gain from fixing string connections illustrates something homeowners rarely hear: underperforming systems can often be corrected. The question is whether you have the commissioning baseline and monitoring data to know you have a problem in the first place.
For homeowners comparing panel options and system designs, a home solar panel guide provides useful vendor-neutral context on equipment basics and what to look for in a system specification.
How to identify poor installation and what to do about it
Start with what you can see, then work toward what the data shows.
Visual and documentation checklist
- Photograph the array from the ground and note any panels that appear to sit flush against the roof with no visible gap.
- Check that all conduit runs are secured, labeled, and protected from physical damage.
- Confirm that the inverter, disconnect switches, and any combiner boxes are clearly labeled with the system’s permit number and emergency contact.
- Look for sealant and flashing at every roof penetration. Missing or cracked sealant is a water intrusion risk.
- Ask for the commissioning report. If the installer cannot produce one, that is a significant problem.
Commissioning and monitoring documents to request
- Baseline production report from the first 30 days of operation
- String-level voltage and current measurements at commissioning
- Torque and polarity verification records
- Rapid-shutdown and AFCI test results
- Warranty registration confirmation from the panel and inverter manufacturers
Steps if you suspect underperformance
- Pull your monitoring data for the past 12 months and compare it against the production estimate in your original proposal. Most proposals include a year-one kWh projection.
- If actual production is more than 10% below the modeled estimate and weather was not unusually poor, document the gap with screenshots from your monitoring platform.
- Contact your installer and request a formal commissioning re-check. Ask specifically for string-level measurements and a comparison against the original commissioning baseline.
- If the installer is unresponsive or the issue involves visible safety concerns (burn marks, exposed wiring, damaged connectors), contact a licensed electrical inspector or a third-party solar inspection service.
- File a complaint with your state contractor licensing board if the installer refuses to address documented deficiencies.
Questions to ask an installer before you sign
- Do you use in-house crews or subcontractors? (Subcontracted crews have less accountability to the installing company’s quality standards. See why subcontractors risk solar quality for a detailed breakdown.)
- What commissioning documentation will I receive at project close?
- How do you handle warranty claims if a workmanship issue surfaces in year 5?
- Can you show me a shading analysis for my specific roof?
- What is your DC-to-AC ratio, and what clipping assumption is built into the production model?
A satisfactory answer includes written documentation, not verbal assurances. If an installer cannot produce commissioning paperwork from past projects as an example, that tells you something.
Key Takeaways
Installation quality is the single largest controllable factor in how much energy your solar system delivers over its lifetime, and commissioning documentation is your primary tool for proving and protecting that output.
| Point | Details |
|---|---|
| Workmanship beats brand | Even a mid-tier panel installed correctly outperforms a premium panel with wiring errors or shading miscalculations. |
| Loss ranges are real | Minor faults cost 1–3% of output; moderate errors 5–15%; major faults or safety failures can exceed 20% or force shutdown. |
| Commission and monitor | Request a written commissioning report and string-level baseline at project close; monitoring platforms catch faults before they cost months of production. |
| 41% had major defects | A Rhode Island inspection study found 41% of inspected systems had major or critical deficiencies, even after passing local permits. |
| San Diego Solar’s approach | San Diego Solar uses 100% in-house crews, documented commissioning, and 30 years of installation experience to deliver systems that perform as modeled. |
The installation quality gap nobody talks about
The solar industry’s marketing machine runs on efficiency ratings, payback calculators, and panel brand comparisons. What it rarely surfaces is the quality gap between a system that performs as modeled and one that quietly underperforms for 25 years while the homeowner assumes everything is fine.
The Rhode Island study’s finding that 41% of inspected systems had major or critical deficiencies is not an outlier from a poorly run program. It is a signal about what happens when installation quality is not actively monitored and enforced. Permitting passes systems that have real deficiencies. Homeowners have no baseline to compare against. Installers face no obligation to correct problems identified after the fact.
What actually protects a homeowner is documentation. A commissioning report with string-level measurements, a monitoring platform with historical data, and a clear workmanship warranty from an installer who will still be in business in ten years. These are not premium add-ons. They are the minimum standard for a system you are betting 25 years of electricity production on.
The panel brand debate is a distraction. The installer you choose, the commissioning process they follow, and the monitoring they set up on day one will determine more of your lifetime output than any nameplate efficiency rating. That is not a contrarian opinion. It is what the inspection data shows.
San Diego Solar delivers the installation quality this article describes
Thirty years of residential solar in San Diego County means San Diego Solar has seen every installation shortcut, every callback pattern, and every workmanship failure mode described in this article. The response has been to build the opposite: 100% in-house crews with zero subcontractors, documented commissioning on every project, and a custom engineering process that accounts for your specific roof geometry, shading profile, and SDG&E rate structure.
Every San Diego Solar installation includes a written commissioning report, string-level verification, and a monitoring setup so you have a baseline from day one. The company handles all permitting, SDG&E interconnection, and HOA approvals, and backs every system with manufacturer warranties up to 25 years. Most San Diego homeowners see payback in 5–7 years with electric bill reductions of 80–92%.
If you want to know exactly what your roof can produce and how a properly commissioned system compares to what you may have been quoted elsewhere, request a free consultation. San Diego Solar provides transparent pricing and a written project timeline before you commit to anything.
Useful sources and further reading
- Study of Renewable Energy Installation Quality in the Renewable Energy Growth Program — The primary inspection study cited throughout this article. Covers 90 residential and small commercial systems in Rhode Island; documents defect rates, severity classifications, and installer response rates. Note: findings reflect a specific state program and may not represent national averages, but the defect categories are consistent with broader industry patterns.
- Solar Photovoltaic Performance and Efficiency Basics, U.S. Department of Energy — DOE explanation of temperature effects, recombination losses, and the factors that limit real-world cell efficiency. Authoritative reference for the temperature coefficient discussion.
- Evaluation and Solution Suggestions for Engineering and Workmanship Failures During Design and Installation of Solar Power Plants — Peer-reviewed engineering study documenting connection failures, design errors, and the production gains achieved after corrective action. Includes the field case showing a ~10% output increase after string rearrangement.
- Impact of Interconnection Failure on Photovoltaic Module Performance, OSTI/Progress in Photovoltaics — Academic analysis of how ribbon-tabbing and connector failures reduce module output and cause energy yield models to underpredict performance loss.
- 10 Common Solar Installation Mistakes, SurgePV — Practitioner-level review of the most frequent installation errors, their output consequences, and their role in warranty claims and safety incidents.
- Advances in Solar PV Systems: A Comprehensive Review of PV Performance, Influencing Factors, and Mitigation Techniques — Broad academic review covering irradiance, temperature, tilt angle, dust, and shading as performance factors; useful for understanding how environmental variables interact with installation choices.
- Why Workmanship Matters More Than Panel Brand, Golden Solar — Industry practitioner perspective on why installation decisions outweigh panel brand selection in determining delivered output.