Why Staggered Installs Cause Roof Damage
Why Staggered Installs Cause Roof Damage
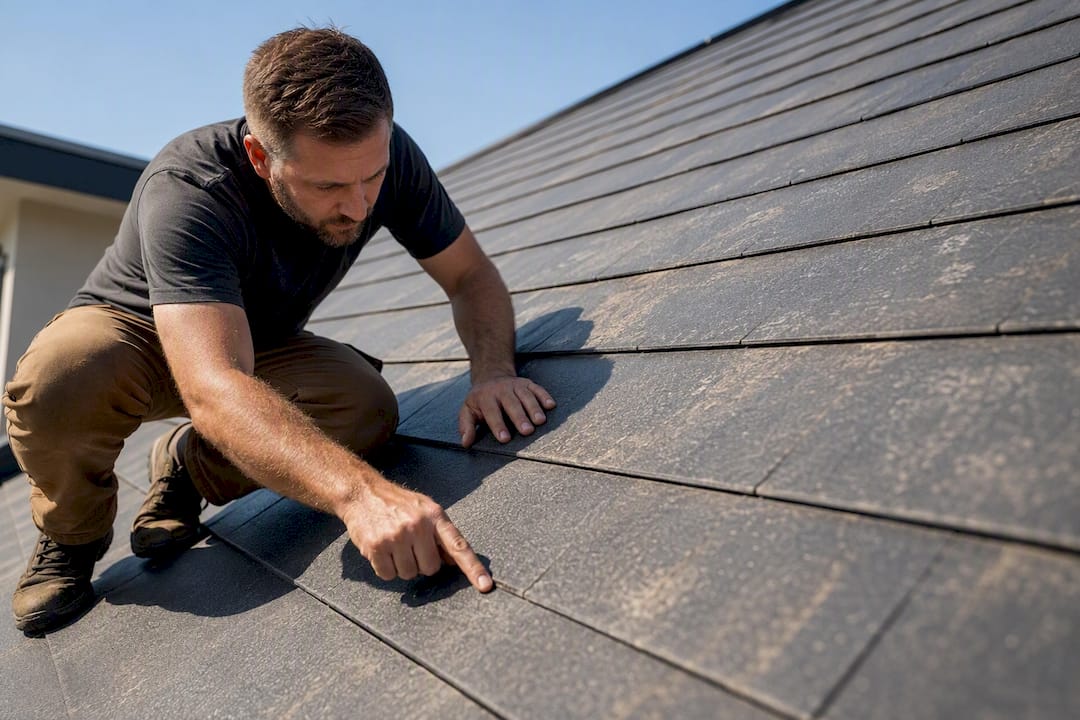
Mis-staggered shingles, often called “racking,” line up seams in a vertical column instead of offsetting them. Those aligned seams become direct channels for water, and the repeated stress along that same line causes leaks, rotted decking, and shingles that fail years ahead of schedule. Manufacturers typically call for a vertical offset of several inches between joints in adjoining rows, and the Asphalt Roofing Manufacturers Association warns that skipping this spec can void your warranty outright. The American Society of Home Inspectors puts it simply: shingles should look like bricks in a wall, not a ladder.
If you’re standing in your yard right now looking at vertical lines running up your roof, here’s what to do before anything else:
- Take photos from the ground and, if safe, from a ladder at several angles.
- Do not walk on the suspect area. Racked sections are often already compromised underneath.
- Schedule a professional inspection right away if you notice attic water stains or streaking below the aligned seams.
Quick fact: A roof repair or replacement that affects more than 25% of the roof area within a rolling 12 month period can trigger full code upgrade requirements in many jurisdictions, which is exactly why a small racking mistake left unaddressed can turn into a much bigger job.
Key Takeaways
Mis-staggered shingles create vertical water channels that cause leaks, decking rot, and premature failure, and manufacturer specs of 4 to 6 inches of offset exist specifically to prevent it.
| Point | Details |
|---|---|
| Aligned seams cause leaks | Racked shingles skip the brick-wall overlap, letting water channel straight to the underlayment. |
| Follow the 4 to 6 inch rule | Manufacturers require this vertical offset; skipping it can void your shingle warranty. |
| Watch for the 25% threshold | Repairs exceeding 25% of the roof area in 12 months can trigger full-replacement code rules. |
| Document before you decide | Photograph seams, attic stains, and measurements before choosing repair versus replacement. |
| Fix stagger issues before solar | San Diego Solar’s in-house crews inspect and correct roofing issues as part of combined roofing and solar projects. |
Table of Contents
- How Does Correct Shingle Staggering Protect Your Roof?
- What Are the Manufacturer Specs for Shingle Stagger?
- How Does a Mis-Stagger Turn Into Actual Roof Damage?
- What Are the Warning Signs of Improper Shingle Staggering?
- What Should You Check Before Calling a Roofer?
- Should You Repair the Roof or Replace It?
- What Should You Ask a Roofer Before Signing a Contract?
- Frequently Asked Questions
- Sources
How Does Correct Shingle Staggering Protect Your Roof?
Think of a properly shingled roof the same way you’d think of a brick wall. Each row of bricks offsets the joints below it, so no single crack or gap runs straight through the structure. Roofing works on the same principle. When installers stagger the vertical joints correctly, water hitting any one seam gets redirected across two or three layers of overlapping shingle before it has any chance of reaching the deck.
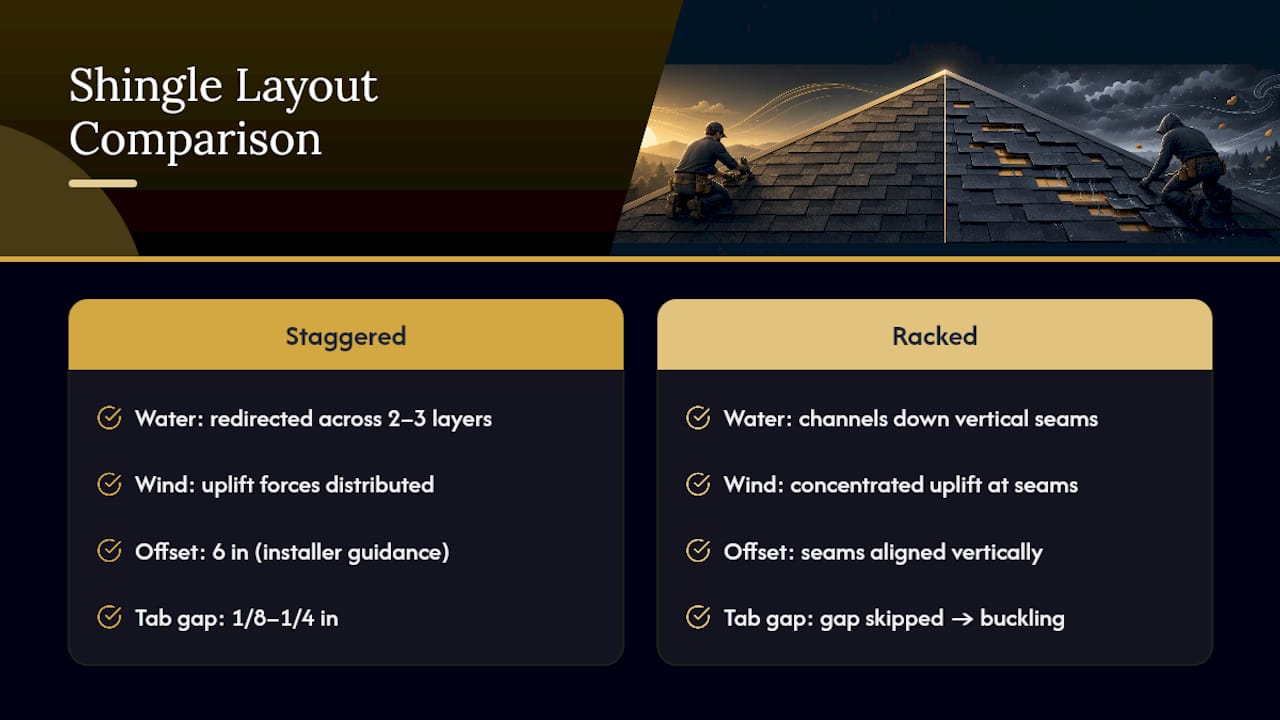
Racked shingles skip that redirection. Every joint lines up in a column, and that column becomes a superhighway for water, especially on lower-pitch roofs where wind-driven rain doesn’t just fall straight down, it gets pushed sideways into every open seam. A steady rain on a properly staggered roof sheds cleanly. The same rain on a racked roof finds the aligned seam and works its way in, drop by drop, until the underlayment gives out.
Staggering also affects wind performance. When joints and cutouts align vertically, they create a repeating weak point that wind can grab and lift, tab after tab, in the same spot. Offsetting the joints breaks up that pattern so uplift forces get distributed instead of concentrated. LocalHero’s installer guidance notes that a common 6 inch offset keeps the seam of one shingle centered over the solid body of the shingle below it, rather than over another seam or the nail line.
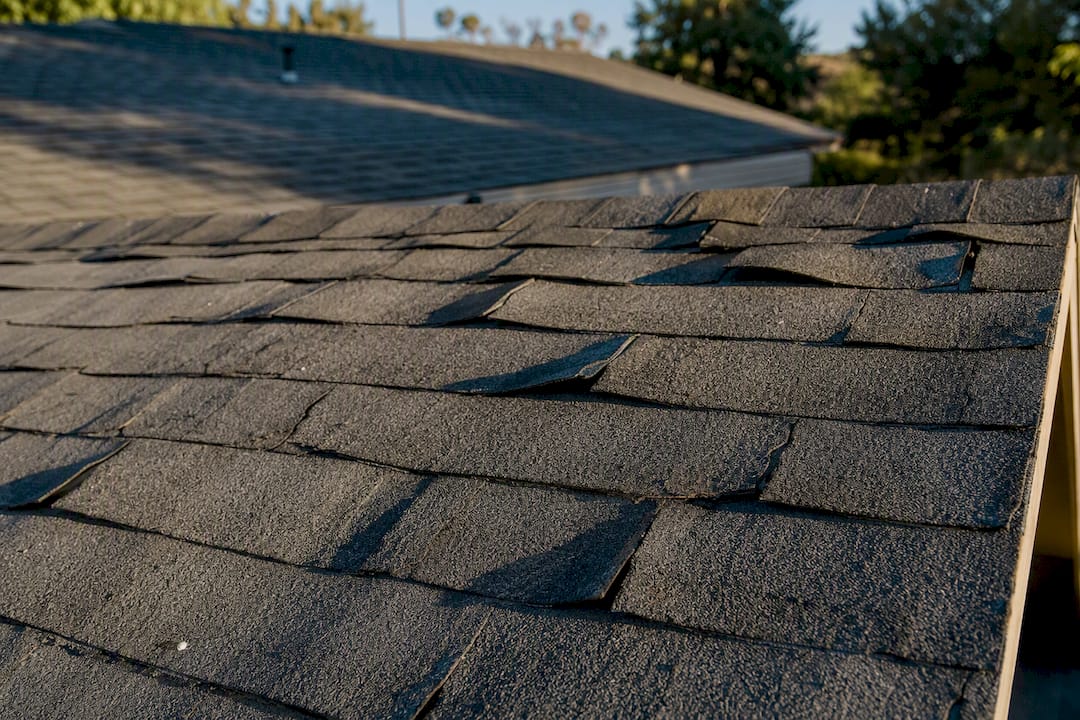
One more detail installers sometimes skip: the horizontal gap between shingle tabs, usually 1/8 to 1/4 inch, exists so asphalt shingles can expand and contract with temperature swings. Skip that gap and you get buckling as the material pushes against itself in summer heat.
Pro Tip: Stand at the base of a ladder and sight up along one roof plane. If you can draw a straight vertical line connecting multiple shingle seams, that’s racking, not staggering, and it’s worth a closer look.
What Are the Manufacturer Specs for Shingle Stagger?
The numbers matter here, because they’re what separates “installed correctly” from “installed fast.” Most asphalt shingle manufacturers, including major brands like GAF and IKO, publish specific application instructions that call for:
- A vertical offset of several inches between joints in adjacent courses.
- A small horizontal gap between shingle tabs for thermal movement.
- A nailing pattern specific to the shingle type, usually four to six nails per shingle depending on wind zone.
- Use of a straight starter course and chalk lines to keep offsets consistent across the entire roof plane.
GAF’s own advisory on installation methods is blunt about the risk of skipping these specs:
Racking, or installing shingles in continuous vertical columns rather than a staggered pattern, is not the preferred method for many shingle types, particularly heavier laminated or designer shingles. Deviating from the application instructions can affect wind resistance and sealing performance, and failures caused by improper installation are not covered under warranty.
The NRCA reinforces the same standard across the industry: follow the shingle manufacturer’s published instructions exactly, because “close enough” installation practices are the single most common reason warranty claims get denied.
If a roofer proposes patching just one racked section to save money, and that section plus any other repair work over the past 12 months adds up to more than a quarter of the roof, many local codes require the whole roof to meet current standards, not just the patched area. Splitting a job into smaller repairs to dodge that threshold rarely saves money in practice.
How Does a Mis-Stagger Turn Into Actual Roof Damage?
Damage from racked shingles doesn’t show up overnight. It follows a fairly predictable sequence, and knowing where you are in that sequence tells you how urgent the fix is.
- Seams stay aligned and water finds the gap. Instead of shedding across overlapping layers, rain concentrates along the vertical column of joints.
- Underlayment takes the hit. Repeated moisture exposure breaks down the felt or synthetic barrier beneath the shingles faster than it should wear.
- Decking absorbs water. Plywood or OSB sheathing swells, softens, and eventually rots if the leak isn’t caught.
- Interior damage follows. Attic insulation gets wet, ceiling stains appear, and in humid climates, mold can start growing in the attic space within days of sustained moisture.
Structurally, the outcomes stack up fast:
- Soft spots in the roof deck that you can feel if you walk the roof (carefully).
- Increased uplift risk during wind events, since improper nailing and racking both raise the chance of shingles blowing off.
- Accelerated granule loss and curling concentrated right along the racked seams.
Picture a low-pitch roof during a wind-driven storm. Water doesn’t just run downhill, it gets pushed sideways into every aligned seam at once, and a roof that might have handled the storm fine with proper staggering ends up with active leaks in multiple rooms by morning. Or consider a smaller case: one racked section near a chimney, installed by a rushed crew years ago. It looks fine from the street. But that single column of aligned seams has been quietly feeding water into the decking for years, and by the time a stain shows up on the ceiling, the rot has usually spread well beyond the original section.
What Are the Warning Signs of Improper Shingle Staggering?
You don’t need to climb onto your roof to catch most of these signs. Start with what you can see from the ground or a stable ladder position.
On the roof itself:
- Vertical “racking” lines where tabs and seams visibly align in a column instead of a staggered brick pattern.
- Concentrated granule loss along one line rather than spread evenly across the roof plane.
- Localized buckling, curling, or lifting shingles clustered along a single seam.
In your gutters and attic:
- Debris streaks concentrated directly below aligned seams, a sign water has been funneling through that spot repeatedly.
- Water stains on attic rafters or sheathing, especially in a line that matches the racked section outside.
- Wet insulation or a musty smell, both early indicators of localized mold before it becomes visible.
The IKO installation guide lists these same visual clues as reliable indicators of poor installation, and recommends documenting them with photos before contacting a roofer.
Pro Tip: When photographing suspected racking, shoot in direct daylight, include a tape measure or ruler in the frame for scale, and get one wide shot of the whole roof plane plus close-ups of the worst seams. That documentation matters if you end up filing an insurance or warranty claim.
What Should You Check Before Calling a Roofer?
A few careful checks now can save you a wasted service call, or confirm you genuinely need one.
Safety first. Skip the ladder entirely if the roof pitch is steep, the shingles are wet, or wind is a factor. A pair of binoculars from the ground beats a fall every time.
- Walk the perimeter and look up at each roof plane for vertical alignment patterns.
- From a stable ladder at the eave (not on the roof), measure the vertical offset between seams in adjacent courses using a tape measure. You’re looking to confirm roughly 4 to 6 inches.
- Snap a chalk line mentally, does the seam pattern zigzag or run straight?
- Check the attic with a flashlight for staining, wet wood, or daylight coming through where it shouldn’t.
- Photograph everything: wide roof shots, close-up seam shots with a ruler for scale, and any attic staining.
Bring these photos and measurements to whichever contractor you call. It saves time and gives them a documented starting point instead of a blind inspection.
Should You Repair the Roof or Replace It?
This decision comes down to a handful of concrete factors, not gut feeling. How much of the roof is affected? What’s the condition of the decking underneath? How old is the roof overall? And critically, has the manufacturer warranty already been voided by the original installation?
When repair makes sense:
- A single racked section, decking still solid, roof under 10 years old.
- Re-laying a few courses, replacing a poorly done starter row, or correcting nailing and flashing in one localized area.
When replacement is the smarter call:
- Rot has spread across multiple sections of decking.
- Several isolated areas were racked independently by different past repair jobs.
- The area needing correction crosses that 25% threshold within a 12 month window, which can force a full-roof code upgrade anyway.
Splitting a reroof into smaller jobs to dodge the 25% rule rarely saves money. It tends to produce repeated repairs, repeated service calls, and eventually the same full-replacement decision, just delayed and more expensive.
Cost wise, expect a full re-lay of a few courses to run far less than a full tear-off and replacement, but exact pricing depends heavily on roof size, material, and local labor rates. If your roof already needs permanent replacement due to structural issues, patching a racked section is just deferring the inevitable.
What Should You Ask a Roofer Before Signing a Contract?
Get specific before you sign anything. Ask which manufacturer’s application instructions the crew follows, by name and version, not a vague “industry standard.” Ask about the nailing schedule, starter course technique, and whether they use chalk lines to maintain consistent offset across the roof.
Your contract should include:
- Written warranty terms that name the manufacturer and specify what voids coverage.
- A materials list tied directly to manufacturer specifications.
- A photo-documented scope of work, before and after.
Red flags worth walking away from: a crew that defends racking as an acceptable shortcut, warranty language that’s vague about installation requirements, or any refusal to document nailing pattern and flashing work in writing.
Pro Tip: Ask to see a copy of the manufacturer’s printed application instructions for the exact shingle they’re proposing to install. A roofer who can’t produce this on request usually isn’t following it.
Why This Matters Before You Add Solar
A properly staggered, well-documented shingle installation isn’t just about avoiding leaks, it’s a prerequisite for a sound solar install. Solar racking needs even load distribution and watertight penetration points, and mounting hardware over a compromised roof plane risks both structural issues and voided warranties on both the roof and the panels.
Before any solar work begins, document and repair mis-staggered sections. It’s cheaper to fix now than to discover a leak under panels later.
- Confirm decking is sound before any roof load calculations for solar are finalized.
- Ask your installer how they handle composition shingle compatibility with mounting hardware.
San Diego Solar has run in-house crews on residential roofing and solar projects across the county since 1996, and that overlap between roofing quality and solar readiness shapes how the company approaches every reroof before a panel goes up.
What Does a Roofer Check First on a Suspected Racked Roof?
Three things, every time: chalk line alignment across the roof plane, the nailing pattern on a sample of shingles, and the condition of underlayment and flashing at the seams. If it’s one isolated section with sound decking, a re-lay often wraps up in a single day. If the checks turn up soaked decking or multiple racked areas, that’s a replacement conversation, and scheduling usually takes longer given permitting and material lead times.
How a Combined Roofing and Solar Team Avoids Rework
There are plenty of ways to handle a racked roof, hire a roofing-only contractor for the repair, then a separate solar installer months later. That approach works, but it also means two companies, two warranties, and two chances for miscommunication about what’s underneath those panels once they’re mounted.
San Diego Solar approaches it differently because roofing and solar are handled by the same in-house crew, with zero subcontractors, in every project. That means one team documents the stagger issue, one team fixes the decking and flashing, and the same team installs the racking and panels on top of it, so nothing gets missed in the handoff.

Homeowners across San Diego County, from Encinitas to Chula Vista, can request a free roof inspection that documents shingle condition, decking soundness, and solar readiness in one visit. If your roof needs both a stagger correction and a future solar system, a combined solar-plus-roofing package means one warranty covering both, instead of finger-pointing between two separate contractors later. Book an inspection and get a written scope of work before committing to anything.
Frequently Asked Questions
What does “staggered” mean in roofing? It means offsetting the vertical seams between rows of shingles so no two joints line up directly above each other, similar to how bricks overlap in a wall.
How much offset should shingles have? Most manufacturers call for a vertical offset of 4 to 6 inches between joints in adjacent rows, along with a small horizontal gap for thermal expansion.
Can racked shingles really void my warranty? Yes. Manufacturers including GAF state that installation deviating from their published application instructions is not covered under warranty, even if the shingles themselves are defect-free.
Is racking always a mistake? For most laminated and designer shingle types, yes, it’s discouraged by manufacturer guidance. Some basic three-tab shingles have different tolerance, but checking the specific manufacturer instructions for your shingle type is the only reliable way to know.
How do I know if my roof needs repair or full replacement?
Sources
- Plain facts about buckled shingles — Asphalt Roofing Manufacturers Association
- Check that roof shingle stagger — American Society of Home Inspectors (ASHI)
- Roof shingle racking/laddering advisory — GAF (via Inspectapedia)
- Spotting the signs of an improper roof installation — IKO blog
- The 25% rule for roofing explained — Mainline Roofing Pros